Learn how to change locomotive addresses, adjust acceleration and braking, and customize your DCC-equipped locomotives.
One of the biggest advantages of Digital Command Control (DCC) is the ability to customize how your locomotives operate. You can adjust how quickly a locomotive accelerates, how gradually it slows down, its maximum speed, lighting effects, and even sound settings.
These adjustments are made through Configuration Variables, commonly called CVs.
If you're new to DCC, programming CVs might sound complicated. Fortunately, once you understand the basics, changing a CV is relatively simple.
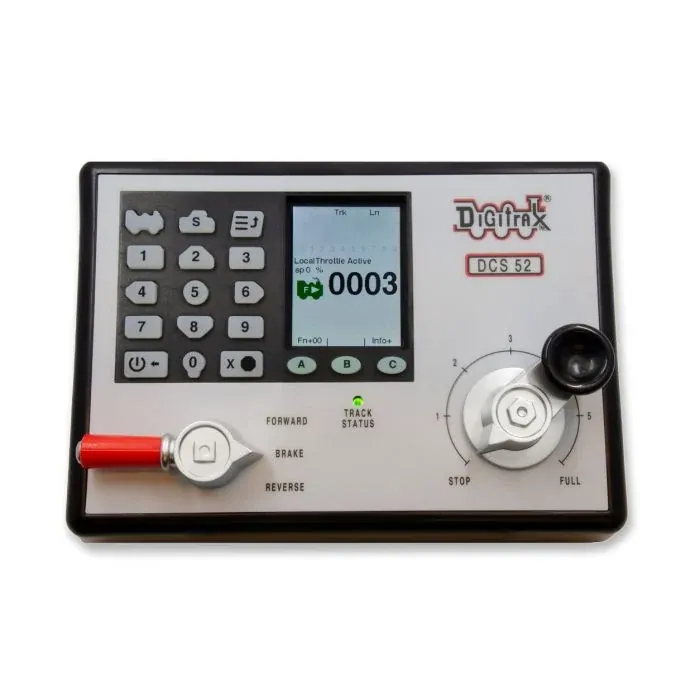
In this Tony's Tips article, we'll explain what CVs are, how they work, and how to change them using an NCE Power Cab or Digitrax DT602 throttle.
What Is a Configuration Variable (CV)?
A Configuration Variable is a setting stored in your locomotive's DCC decoder.
Think of a CV as an adjustable setting in your locomotive's electronic control system. Each CV has a number identifying the setting and a value determining how that setting behaves.
For example:
| CV Number | Function | Example Value |
|---|---|---|
| CV3 | Acceleration | 10 |
| CV4 | Deceleration | 8 |
| CV5 | Maximum speed | 150 |
In this example, CV3 controls acceleration, and its programmed value is 10.
The CV number tells the decoder which setting to adjust. The CV value tells it how to behave.
Most basic CVs accept values between 0 and 255, although the valid range and meaning depend on the particular CV and decoder.
Some CVs contain several individual settings combined into one number. CV29 is a common example.
Why Would You Want to Change a CV?
There are many reasons to adjust your locomotive's CV settings.
- Locomotive addressing: Give a locomotive its own DCC address.
- Acceleration: Make a heavy freight train take longer to reach speed.
- Deceleration: Simulate the gradual braking of a real locomotive.
- Speed control: Adjust starting speed, maximum speed, and speed curves.
- Lighting: Customize headlights, ditch lights, and other effects.
- Sound: Adjust the volume and operation of horns, bells, whistles, and other sounds.
Not every decoder supports every feature, and some manufacturers use different CVs for specialized functions.
Important: Always consult your decoder manufacturer's manual before changing a CV. Record the original value whenever possible so you can restore it if necessary.
Programming Track vs. Programming on the Main
DCC systems generally provide two ways to program locomotive decoders.
1. Service Mode (Programming Track)
Service Mode is commonly called programming-track mode.
It allows you to program a decoder without knowing its current locomotive address. With compatible equipment and decoders, you can also read the existing value of a CV.
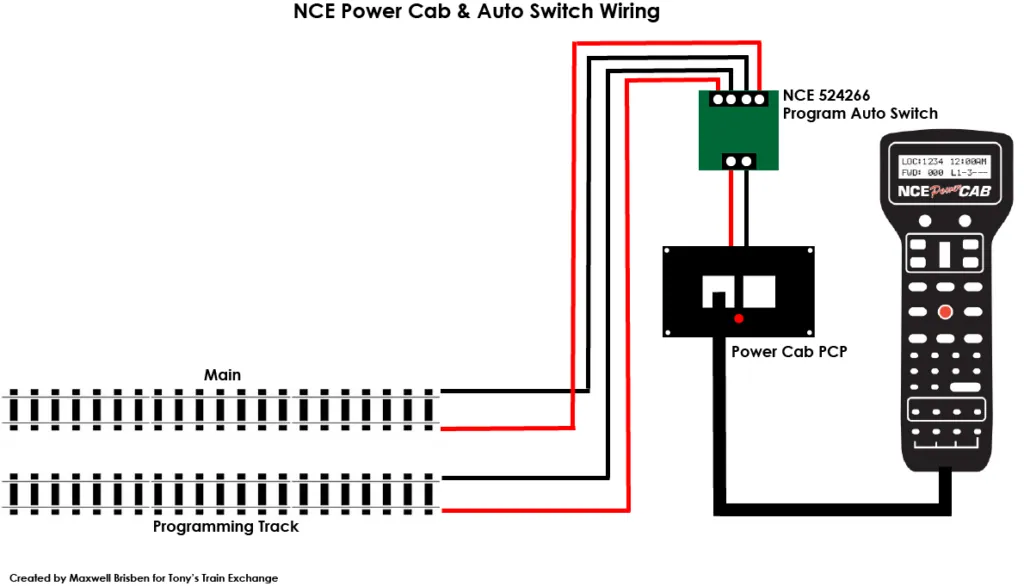
A dedicated programming track is a short, electrically isolated section of track connected to your command station's programming-track output.
Typical programming-track arrangement:
DCC Command Station → Programming Track Output → Isolated Track → Locomotive
With systems that provide a dedicated programming-track output, the locomotive being programmed is separated from the rest of the layout.
Special note for NCE Power Cab owners:
The basic Power Cab has no separate programming-track output. When you select Service Mode, it sends programming commands through its normal track connections. Any decoder-equipped locomotive connected to that output may be programmed.
For this reason, remove all other locomotives before entering Service Mode with a Power Cab.
2. Operations Mode (Programming on the Main)
Operations Mode, frequently called Ops Mode or POM, lets you change CV settings while a locomotive is on the main layout.
Instead of broadcasting Service Mode programming commands to every decoder on the connected track, the system normally addresses the selected locomotive.
For example, you can select locomotive address 1234, enter Ops Mode, and change CV3 to adjust acceleration.
Other locomotives using different addresses should not be affected.
However, locomotives sharing the selected address may also respond. Some decoders also support special broadcast or accessory programming behavior, so verify the selected address and programming method before writing changes.
Which Method Should You Use?
| Feature | Programming Track / Service Mode | Ops Mode |
|---|---|---|
| Read existing CV values | Usually yes | Usually no |
| Change CV values | Yes | Yes, when supported |
| Requires known locomotive address | No | Normally yes |
| Program locomotive address | Preferred | Decoder-dependent |
| Adjust acceleration or braking | Yes | Yes |
| Factory reset | Generally preferred | Decoder-dependent |
For beginners, we recommend using Service Mode when learning CV programming, particularly if you want to read and record existing values.
Your First CV Change: Adjusting Acceleration
Let's start with one of the easiest and most useful CV adjustments.
CV3 controls acceleration momentum.
With little or no acceleration momentum, a locomotive quickly responds to changes in throttle speed. Increasing CV3 generally makes the locomotive accelerate more gradually.
<small>Example: Changing CV3 from 0 to 10</small>
| Setting | CV3 Value | Expected Behavior |
|---|---|---|
| No programmed acceleration delay | 0 | Locomotive responds quickly to throttle changes |
| Moderate acceleration momentum | 10 | Locomotive accelerates more gradually |
The exact acceleration characteristics depend on the decoder and its other settings.
A value of 10 is a good starting point for experimenting with momentum. You can increase or decrease it later to suit your preferences.
How to Change CV3 Using an NCE Power Cab
The following procedure uses Service Mode programming on a standard NCE Power Cab.
Before beginning:
Remove every other locomotive from the track connected to the Power Cab. Leave only the locomotive you intend to program.
- Press the PROG/ESC button four times until the display reads USE PROGRAM TRK.
- Press ENTER.
- Select 2 – CV to program an individual CV.
- The display will prompt you for the CV number.
- Enter 3, then press ENTER.
- The Power Cab will attempt to read the locomotive's existing CV3 value.
- Record the current value for reference.
- Enter 10 as the new CV value.
- Press ENTER to write the value.
- Press PROG/ESC to return to normal locomotive operation.
Now select your locomotive and gradually advance the throttle.
You should notice that the locomotive accelerates more slowly as the speed setting increases.
If you want more momentum, try a higher CV3 value. If the locomotive takes too long to accelerate, decrease the value.
Tip: If the Power Cab displays Cannot Read CV, the problem may be electrical contact, programming power, or decoder acknowledgment. A failed read does not always mean the decoder cannot be programmed.
How to Change CV3 Using a Digitrax DT602 Throttle
The Digitrax DT602 provides several programming options. For this example, we'll use Direct Mode programming on a dedicated programming track.
- Place the locomotive on the programming track connected to your Digitrax command station.
- Press the MENU (≡) button.
- Select 2 – CV Programmer.
- Select 2 – Pd; Direct on Prg Trk.
- Press the A (CVNUM) soft key.
- Enter 3 for CV3.
- Press the B (CVDATA) soft key.
- If desired, use READ to retrieve the existing value and record it.
- Enter 10 as the new value.
- Press A (WRITE) to program the decoder.
- Wait for the programming confirmation.
- Press DONE or EXIT to return to normal operation.
Move the locomotive to your powered main track and test its acceleration.
You can repeat the procedure using different CV3 values until you're satisfied with the locomotive's response.
What About Programming on the Main?
You can also change CV3 without moving the locomotive to a separate programming track.
For an NCE Power Cab, select the locomotive's existing address, press PROG/ESC once to access PROGRAM ON MAIN, press ENTER, and follow the prompts to select an individual CV and enter its new value.
For a Digitrax DT602, select the locomotive, open MENU → 2 (CV Programmer) → 1 (Po; Ops on Mainline), verify the programming address, select CVNUM, enter 3, select CVDATA, enter 10, and press WRITE.
Ordinary Ops Mode programming generally does not read back existing values, so it's especially important to know which setting you're changing.
Changing CV4: Adjusting Braking Momentum
Once you've successfully changed CV3, try experimenting with CV4.
CV4 controls deceleration, or how gradually a locomotive slows down after you reduce the throttle speed.
For example:
| CV | Value | Function |
|---|---|---|
| CV3 | 10 | Acceleration momentum |
| CV4 | 8 | Deceleration momentum |
With these settings, the locomotive should gradually accelerate and decelerate instead of responding instantly to throttle changes.
A higher CV4 value generally creates a longer stopping delay.
Safety tip:
Start with modest CV4 values. Excessive braking momentum can make a locomotive difficult to stop quickly, particularly near the end of a track or in a crowded yard.
Some advanced sound decoders provide additional braking controls that can interact with CV4.
Common CVs Every Beginner Should Know
You do not need to memorize hundreds of CVs. Learning a few common settings will help you understand most basic decoder programming tasks.
| CV | Function | What It Controls |
|---|---|---|
| CV1 | Short address | Locomotive's primary DCC address |
| CV2 | Starting voltage | Starting speed behavior |
| CV3 | Acceleration | How gradually a locomotive speeds up |
| CV4 | Deceleration | How gradually a locomotive slows down |
| CV5 | Maximum speed | Upper limit of motor speed, when supported |
| CV6 | Midpoint speed | Midrange speed adjustment, when supported |
| CV7 | Decoder version | Manufacturer-assigned decoder version information |
| CV8 | Manufacturer ID | Identifies the decoder manufacturer; also used for some reset procedures |
| CV17–18 | Extended address | Used together for a long locomotive address |
| CV29 | Decoder configuration | Addressing mode, direction, speed-step settings, and other options |
A note about CV29: Unlike a simple acceleration setting, CV29 contains multiple configuration options encoded into a single numeric value. Changing it incorrectly can cause a locomotive to respond to a different address or direction setting.
We recommend using your DCC system's address-programming menu rather than manually changing CV29 when assigning a locomotive address.
Troubleshooting: Why Won't My Decoder Accept a CV Change?
Sooner or later, most DCC users encounter a decoder that won't read or accept a programming command.
Here are several common causes.
1. Poor Electrical Contact
Dirty rails, dirty wheels, and poor pickup connections can prevent reliable programming.
What to check:
Clean the programming track and locomotive wheels. Make sure the locomotive is properly seated on the rails.
2. Insufficient Programming Power
Some sound decoders draw more current during startup than a programming-track output can supply.
As a result, the command station may display a read or programming error.
What to check:
Consult the decoder manual and DCC system documentation. Some installations may require a compatible programming-track booster or another supported programming method.
3. Incorrect Programming Mode
Some decoder functions can only be changed in specific programming modes.
If Ops Mode fails, try Service Mode on an appropriate programming track.
4. Incorrect CV Number or Value
Not every decoder supports every CV.
For example, some advanced decoders use manufacturer-specific settings for speed and sound control.
Check the decoder manual to confirm that the CV exists and that your chosen value is valid.
5. Indexed CV Programming
Some modern decoders use indexed CVs to access additional settings.
These typically involve programming an index or page selection before changing the desired value.
For a more detailed explanation, see our Tony's Tips article:
Programming Indexed Control Variables & Understanding Indexed CVs
6. The Change Was Accepted but Nothing Happened
Some decoder settings do not produce an obvious change until the locomotive is moved or the decoder is restarted.
Try removing track power briefly and restoring it.
Also remember that other decoder settings can override or interact with the CV you changed.
7. The Decoder Still Won't Respond
If you cannot read or write a CV, test the locomotive under normal operation.
A locomotive that runs correctly but cannot be read on a programming track may have a programming acknowledgment problem rather than a failed decoder.
Before resetting anything, confirm the decoder manufacturer and follow its recommended troubleshooting procedure.
How Do I Reset a Decoder to Factory Defaults?
Many DCC decoders support a factory reset by writing a value of 8 to CV8.
However, this is not universal. Different decoder manufacturers may use different reset commands or procedures.
A general reset procedure is:
- Identify the decoder manufacturer and model.
- Consult its manual for the correct reset command.
- Use the recommended programming mode.
- Write the specified reset value.
- Remove and restore power if instructed.
- Test the locomotive using the manufacturer's default address, commonly address 3.
Warning: A factory reset may erase customized locomotive addresses, speed settings, lighting configurations, sound volume adjustments, and other programmed values.
Do not reset a decoder simply because one CV cannot be read. Investigate track contact, programming power, and decoder compatibility first.
Do All DCC Decoders Use the Same CVs?
The National Model Railroad Association (NMRA) defines standardized Configuration Variables that help decoders from different manufacturers operate with compatible DCC systems.
For example, CV3 and CV4 are commonly used for acceleration and deceleration.
However, manufacturers including SoundTraxx, ESU, TCS, NCE, and Digitrax also provide advanced features using manufacturer-specific CVs.
That means the same DCC system can program many different decoder brands, but the settings available depend on the decoder itself.
Your DCC system sends the programming commands. The decoder determines how it interprets those commands.
Final Thoughts: Start with One CV
Learning DCC programming doesn't have to be complicated.
Start by changing a basic setting such as CV3. Record the original value, program a new value, and operate the locomotive to see the results.
Once you're comfortable with acceleration, experiment with CV4 and other basic settings.
As you gain experience, you'll be able to customize locomotive performance, adjust lighting, fine-tune sound, and improve the overall realism of your model railroad.
The key is to change one setting at a time, record your adjustments, and consult the decoder manufacturer's documentation.
Need Additional DCC Help?
At Tony's Train Exchange, we specialize in DCC systems, decoders, layout electronics, and accessories.
Whether you're just getting started with an NCE Power Cab or operating a larger layout with Digitrax, our team can help you select the appropriate equipment for your model railroad.